Session Setup
This guide will help you create a fresh e-commerce session in OrderWise for your Shopify integration. Creating a new session avoids legacy quirks and ensures optimal order synchronization.
Before You Start
Ensure you have:
- Admin access to OrderWise
- Email address of the person responsible for the integration
- A dedicated Shopify "admin user" in OrderWise for imported orders
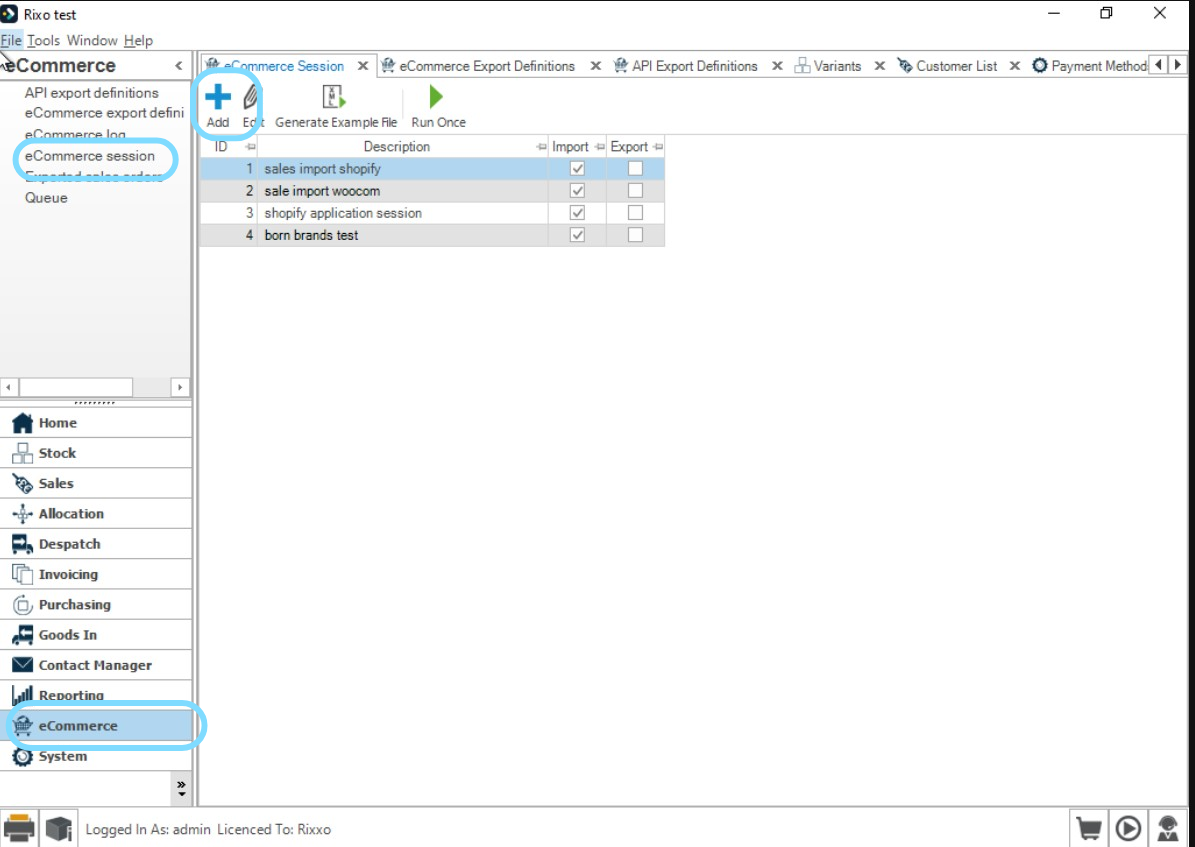
Step 1: Create a New Session
- Go to E-Commerce → E-Commerce Sessions in OrderWise
- Click Add to create a new session
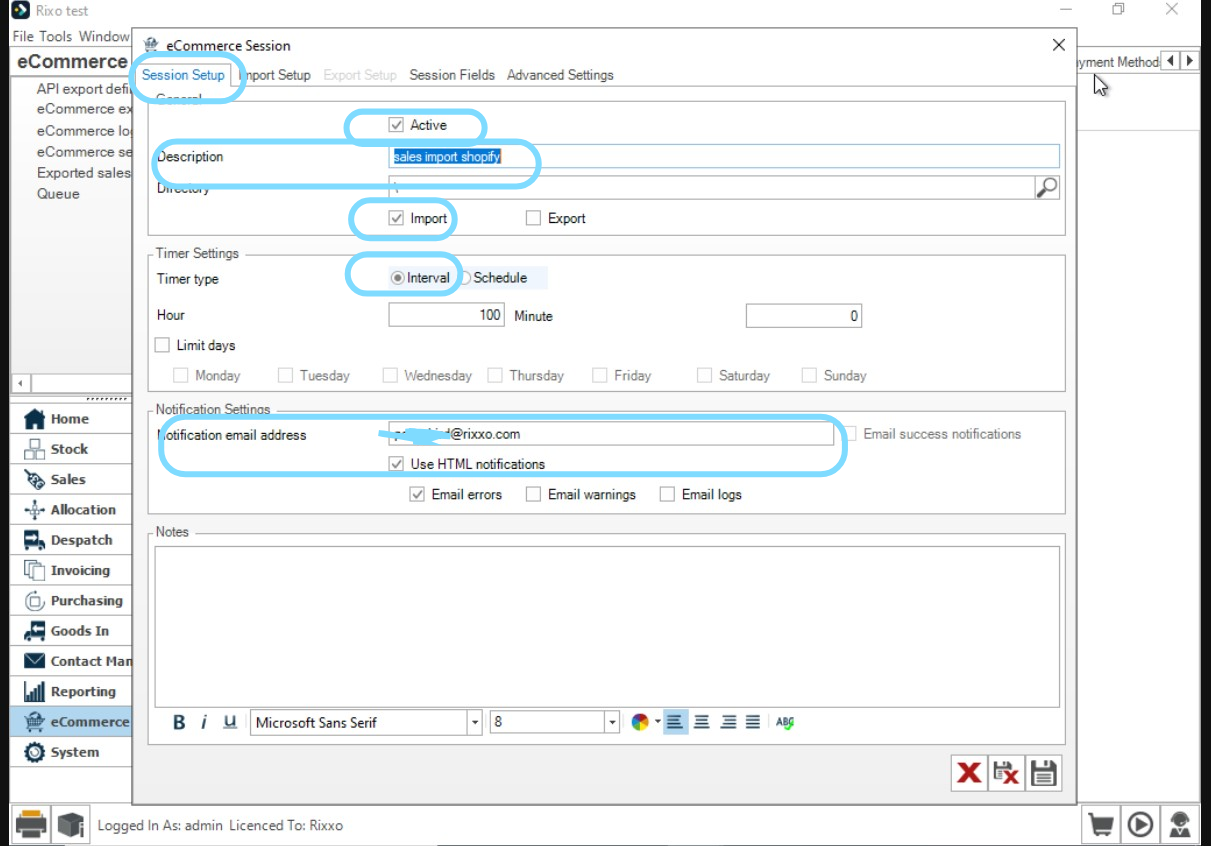
- Name: Use something clear (e.g., your Shopify shop name)
- Export: Set to Off (unticked)
- Schedule: Set to Every 5 minutes
- Notification email: Enter the responsible person's email
Why these settings?
- Export off prevents unintended pushes
- Short schedule keeps imports flowing
- Notifications ensure someone sees errors promptly
Step 2: Import Setup Tab
- Transfer Type: Set to Web Service
- Review other options carefully—changes here can impact the integration
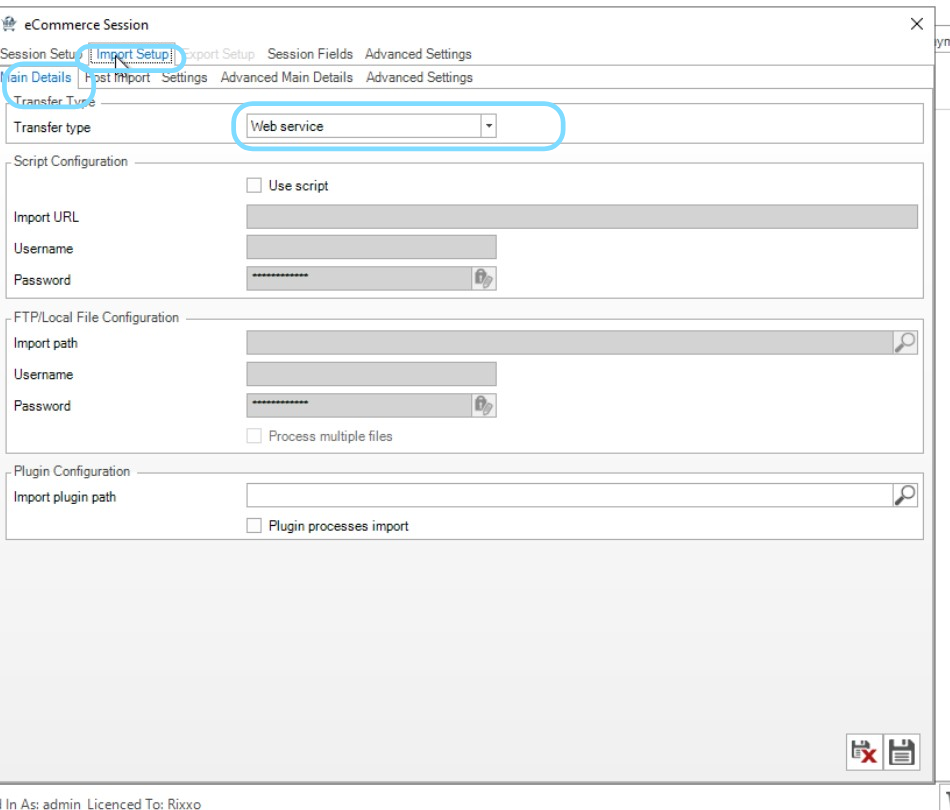
Note: Only change options you understand or that are documented by your integration plan.
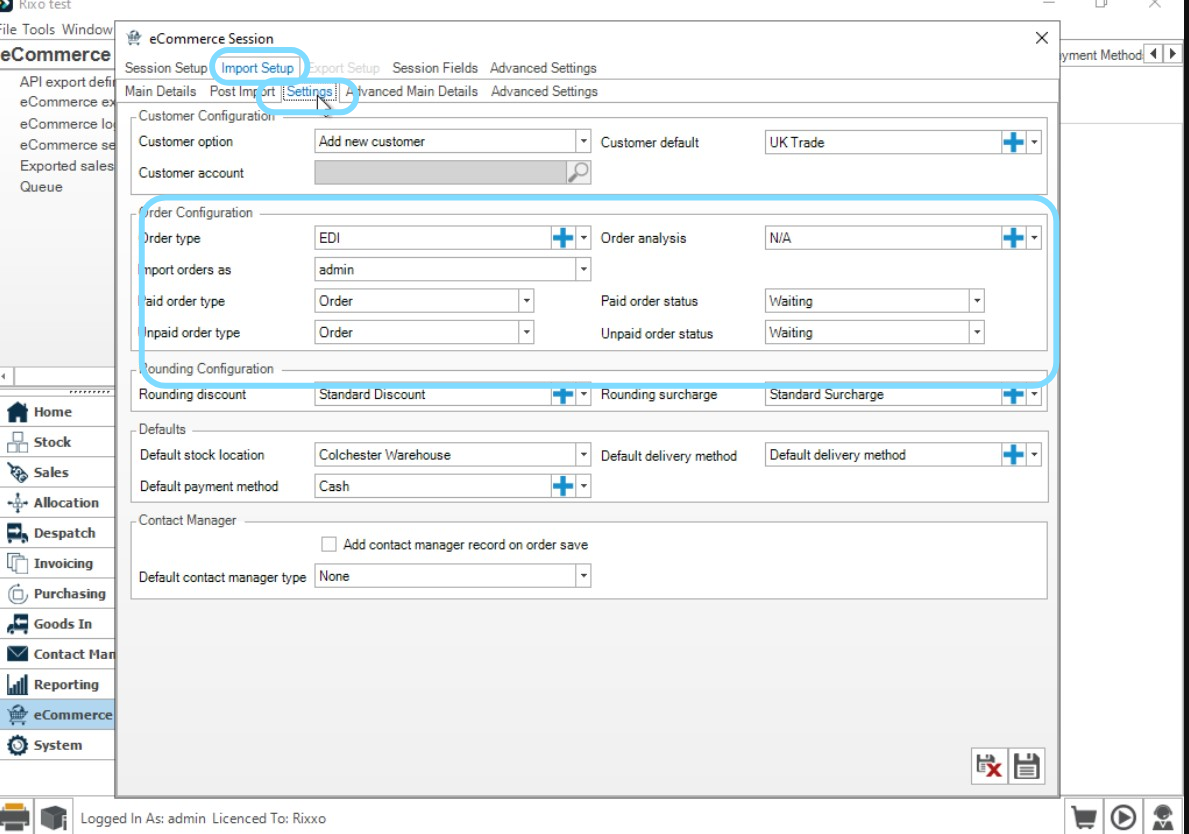
Step 3: Settings Tab (General Session Settings)
Review all settings and confirm they fit your site's behavior:
- Import orders as: Set a dedicated Shopify user (recommended)
- Create a user in OrderWise for Shopify orders (e.g., Shopify_Orders)
- This keeps audit trails tidy and avoids orders showing against real staff members
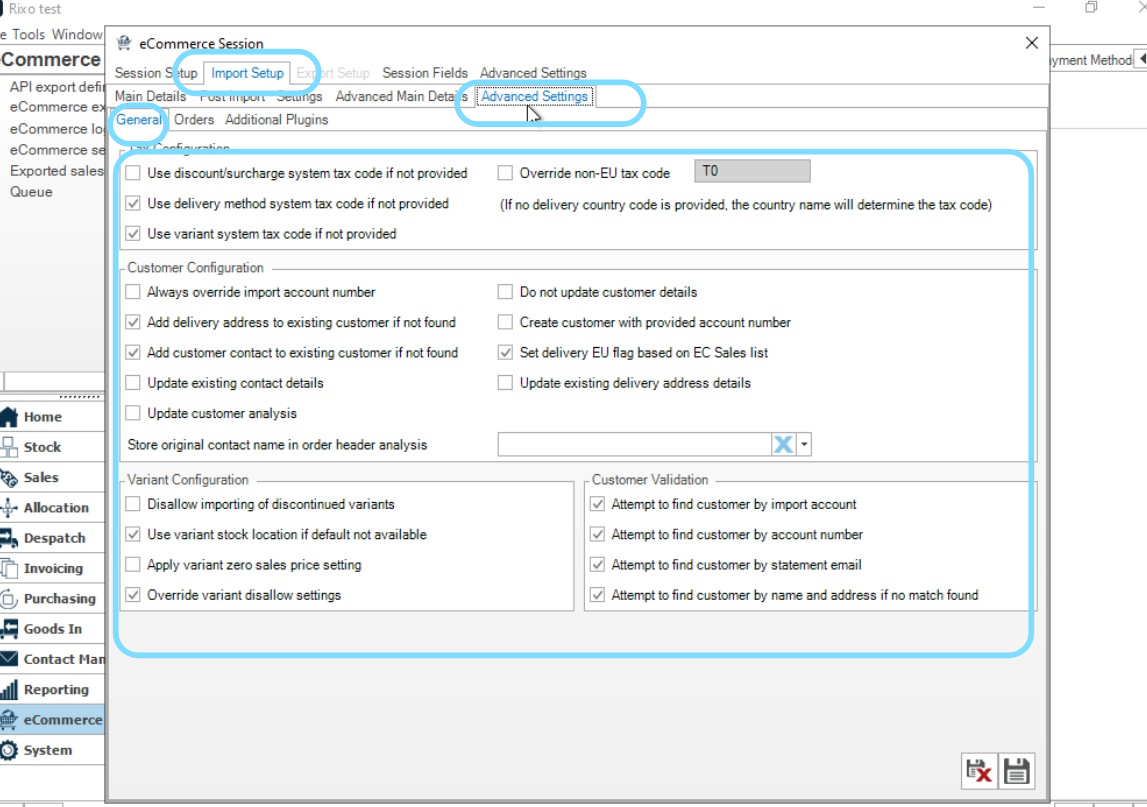
Step 4: Import Setup → Advanced Settings
Tax Configuration
- Use Delivery Method system tax code: Ticked
- Use CVariant system tax code: Ticked
Customer Configuration
- Add Customer Contact to existing customer if not found: Ticked
Variant Configuration
- Use CVariant stock location if default is not available: Ticked
- Override Variant Disallow setting: Ticked
Customer Validation
- Tick all options (ensures stricter checks to maintain data quality)
Step 5: Save Configuration
Click Save to commit all settings.
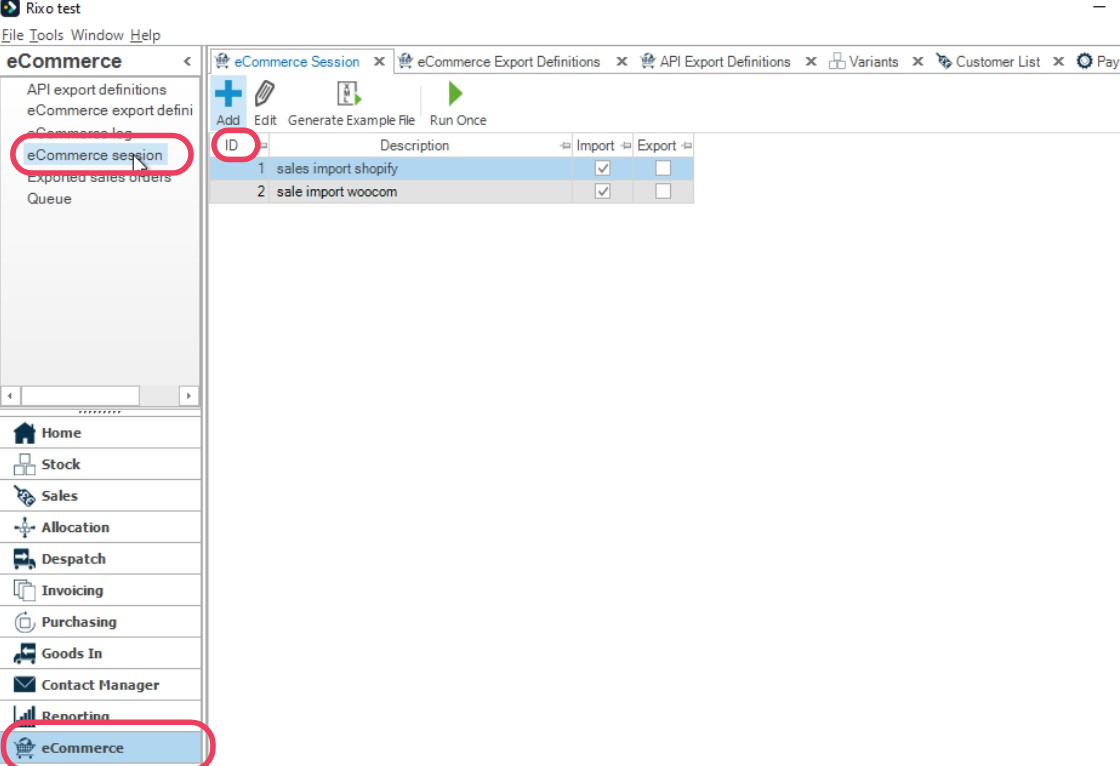
Finding Your Session ID
After creating and saving your session, you'll need the Session ID for the Shopwise configuration:
- Go to E-Commerce → E-Commerce Sessions
- Identify your new import session
- Right-click on the grid and select Edit Grid Layout
- Add the ID column to the grid
- Note the Session ID for use in Shopwise
Next Steps
With your OrderWise session configured, you're ready to:
- Configure Orderwise Integration - Set up the main integration settings
- Set up Stock Updates - Configure inventory synchronization
- Configure Mappings - Set up payment, shipping, and status mappings
Session created successfully? Proceed to Orderwise Integration to configure the main settings.