
Orderwise Integration
This section covers the main configuration settings for connecting your Shopify store with OrderWise. The integration includes four key areas: Basic Settings, Payment Mappings, Shipping Mappings, and Status Mappings.
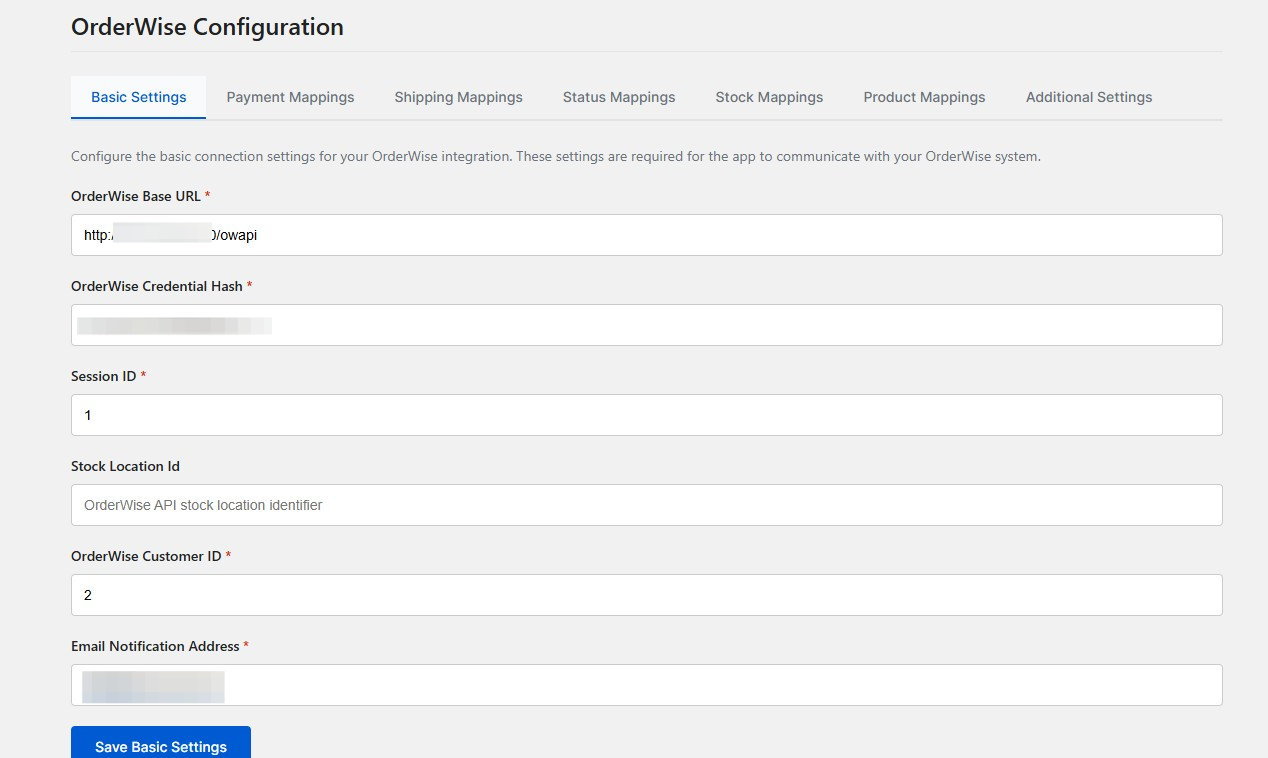
Basic Settings
Basic settings control the core functionality required for the OrderWise app to operate correctly.
Orderwise Base URL
The OrderWise base URL is the API endpoint for your OrderWise instance. This is where all data will be sent.
Format: https://your-orderwise-instance.com/api/
Orderwise Credential Hash
This is a base64-encoded version of user credentials for OrderWise authentication.
How to create credentials:
- Take your username and password
- Format as:
username:password - Encode using base64 encryption
- Use online tools like base64encode.org or AI services like ChatGPT
Example:
- Username:
rabbit - Password:
carrot - Format:
rabbit:carrot - Base64 encoded:
cmFiYml0OmNhcnJvdA==

Session ID
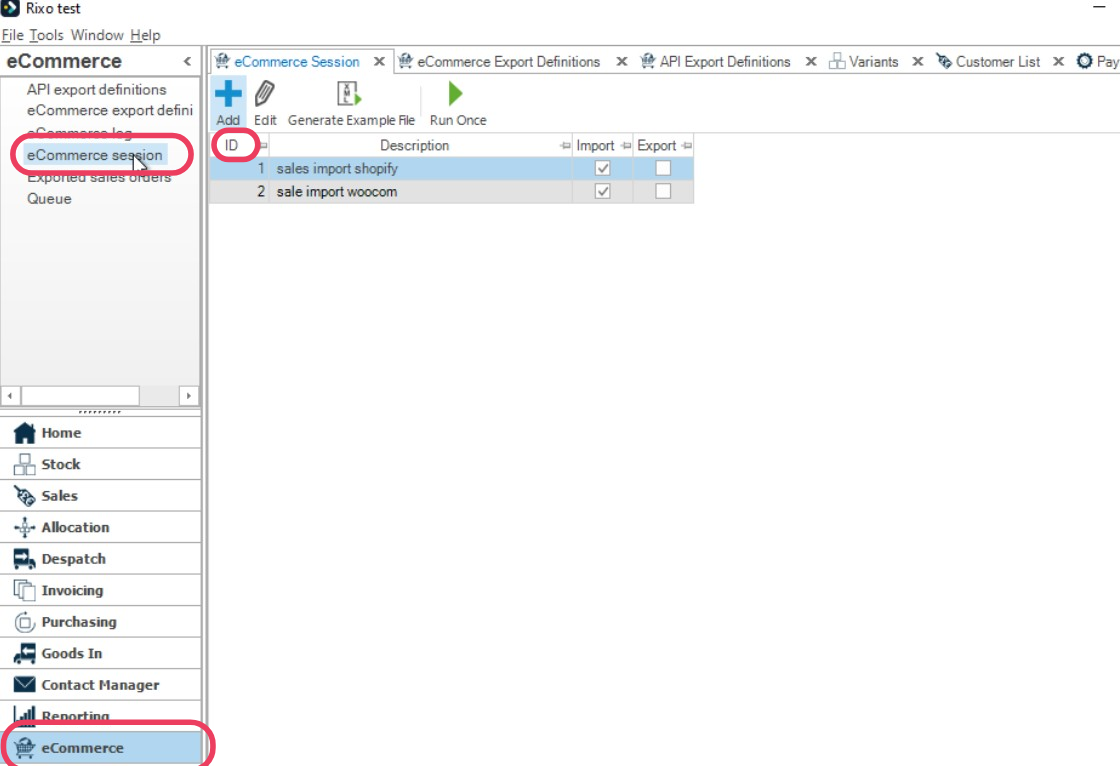
The Session ID is the OrderWise e-commerce session ID that orders will be sent through.
To find your Session ID:
- Go to your OrderWise instance
- Click E-Commerce in the bottom left menu
- Click E-Commerce Sessions in the top left menu
- Identify your import session
- Right-click and select Edit Grid Layout
- Add the ID column to see the Session ID
Stock Location Identifier
This setting allows you to specify a default stock location for all orders from this store.
- Must match your stock location ID in OrderWise
- Optional setting - leave blank if not needed
- Ensures consistent stock location assignment
OrderWise Customer ID
Customer handling depends on which mapping mode you use:
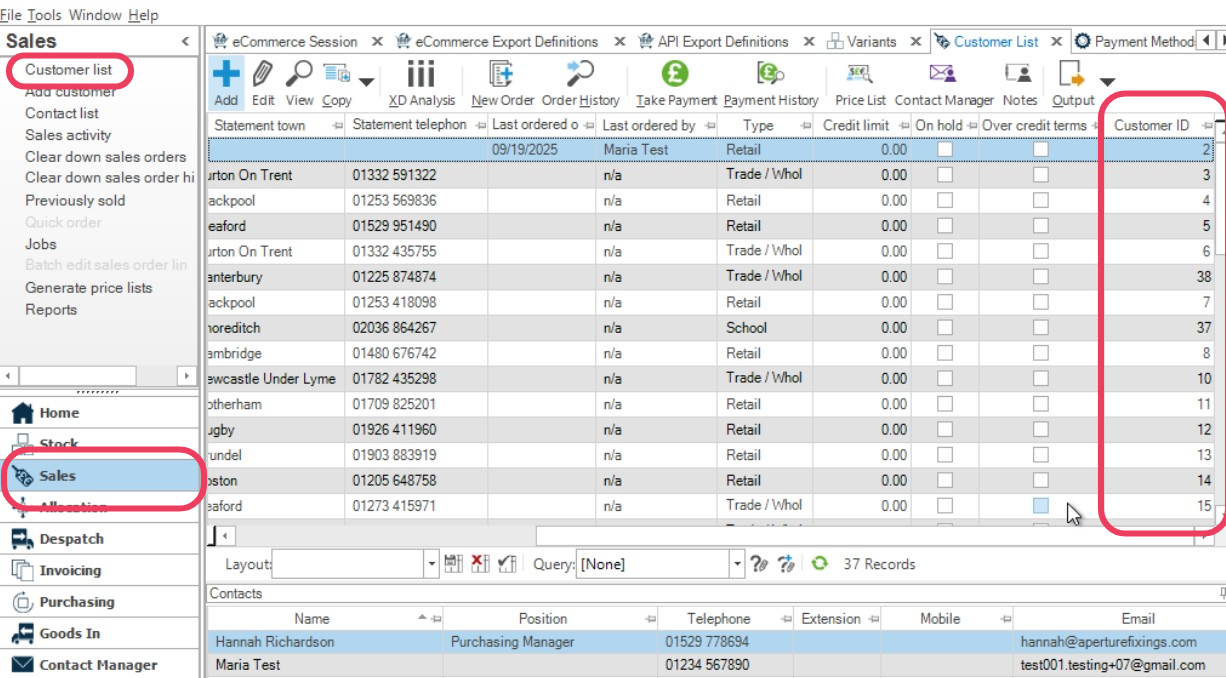
Single-customer mode — all orders are placed against one named OrderWise customer account. Enter that customer's OrderWise Customer ID in this field.
To find a Customer ID:
- Go to your customers in OrderWise
- Right-click on the screen and select Edit Grid Layout
- Add the Customer ID column
- Note the ID of the customer you want to use
One-to-one mode — each Shopify customer is matched to (or created as) an individual OrderWise customer, with the OrderWise ID stored in a Shopify customer metafield. Most B2B clients use this mode.
For one-to-one matching to work, you must create a customer metafield in Shopify (for example custom.customer_account_number) and select it in the ShopWise customer ID settings field. This metafield must be of type Integer — using Single line text (or any other type) will cause customer sync to fail, which in turn can cause order sync to fail or retry incorrectly.
Email Notification Address
This field is for notifications of failed orders. Any email addresses entered here will receive notifications when order synchronization fails.
Recommended: Use a monitored email address for your integration team.
Configuration Summary
Once you've configured all basic settings, your integration should include:
- ✅ OrderWise Base URL
- ✅ Credential Hash (base64 encoded)
- ✅ Session ID from your e-commerce session
- ✅ Stock Location ID (if applicable)
- ✅ Customer ID for orders (or Integer customer metafield for one-to-one mode)
- ✅ Notification email address
Next Steps
With basic settings configured, you can now set up:
- Stock Updates - Configure inventory synchronization
- Payment Mapping - Map Shopify payment methods to OrderWise
- Shipping Mapping - Map shipping methods between systems
- Status Mapping - Configure order status synchronization
Testing Your Configuration
After setting up basic settings:
- Check the Log Manager for any connection errors
- Try sending a test order from Shopify
- Verify the order appears in OrderWise
- Check that notifications are working
Basic settings configured? Proceed to Stock Updates to set up inventory synchronization.